Smart Answering eGuide, Part 1: Start With a Free Personalized Demo
This guide provides instructions for testing your free, personalized demo of Smart Answering.
Resources
Get the latest voice AI news, keep up on trends, get expert advice, and discover new solutions.
Our Company

Named Leader in IDC MarketScape: Conversational AI Platforms 2025 Vendor Assessment

Now that you’ve launched your Smart Answering AI assistant, let’s dive into some of the administrative settings that will help you manage and enhance your experience.
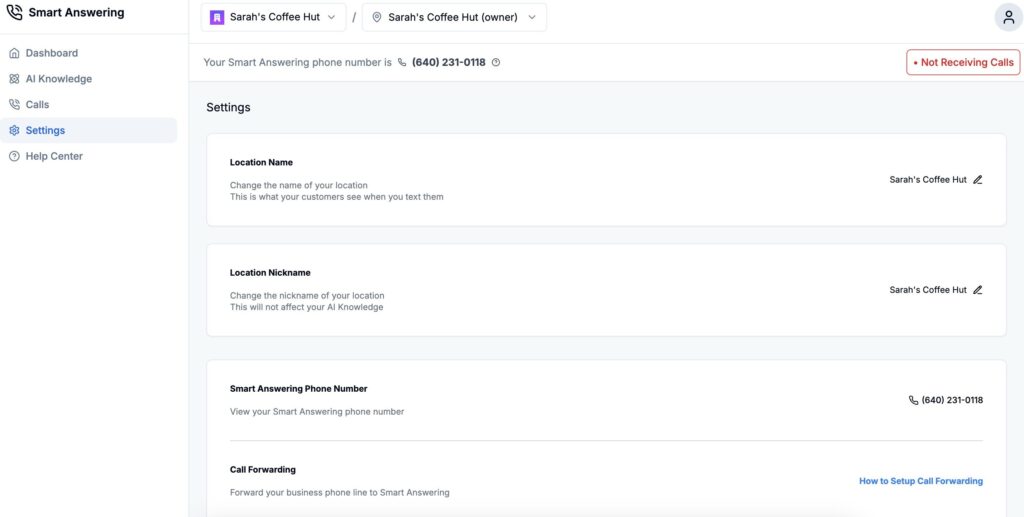
To view and adjust your account settings, click “Settings” from the menu on the left-hand side of the Smart Answering platform.

Along with giving you the option to change the name of your business location and view your Smart Answering phone number, the Settings page offers you the ability to:
In some cases, owners may own more than one location of a business. As such, the Smart Answering platform allows owners to create AI assistants that are unique to each location.
Within the Smart Answering platform, you will see your organization name and location name listed at the top of your screen, as shown below:

To create a new AI assistant for another location, click the carrot (v) next to your first location name (shown in the drop down menu above), and then click “Create.”
A menu will open on the right-hand side of your screen. Add the name of your new location and select the industry. From there, you will be guided through the process of building the knowledge base for the new location’s AI assistant.

Note: If you would like to clone the AI Knowledge from your original location’s AI assistant, please contact us.
Similarly, if you are the owner of another business entirely, you can also create a new AI assistant for this new business. To do so, click the carrot (v) next to your first organization name at the top of your Smart Answering platform and click “Create.”
You may invite team members to join your business’s Smart Answering platform to help with managing and/or testing your AI assistant.
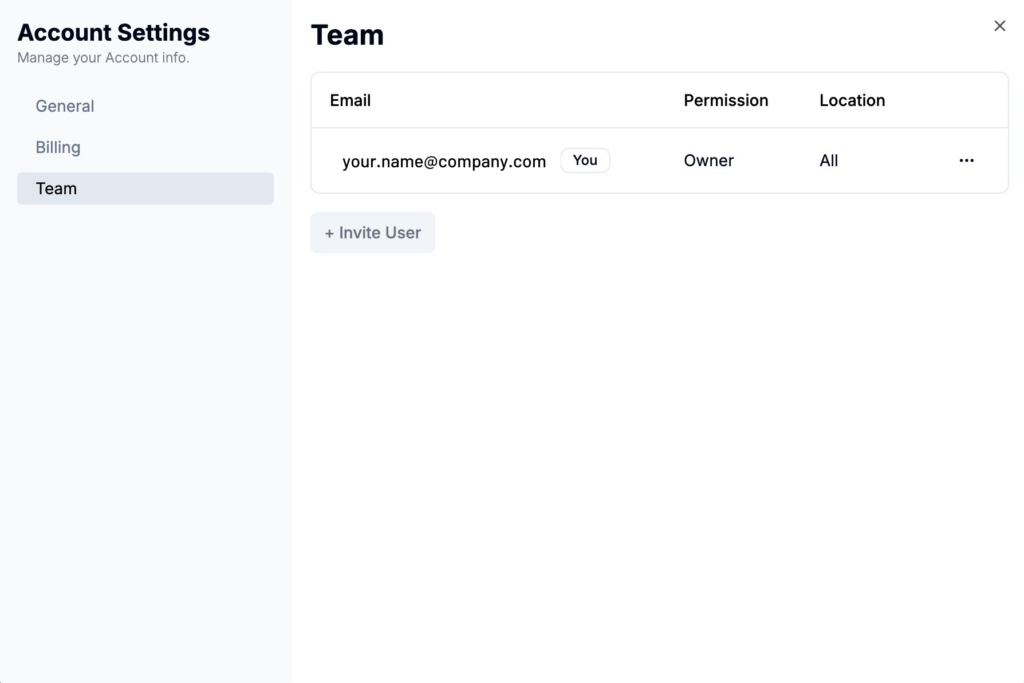
Click the user icon at the top right-hand corner of your screen, and click on “Account Settings.”
In the window that pops up, click “Team.”

From there, you will see everyone who is currently a team member within your Smart Answering platform, as well as their permissions and assigned locations (i.e., if you are a restaurant owner with two locations, you may assign a staff member to manage the AI Knowledge for one of the locations).
Click the “+ Invite User” button to invite a new team member.

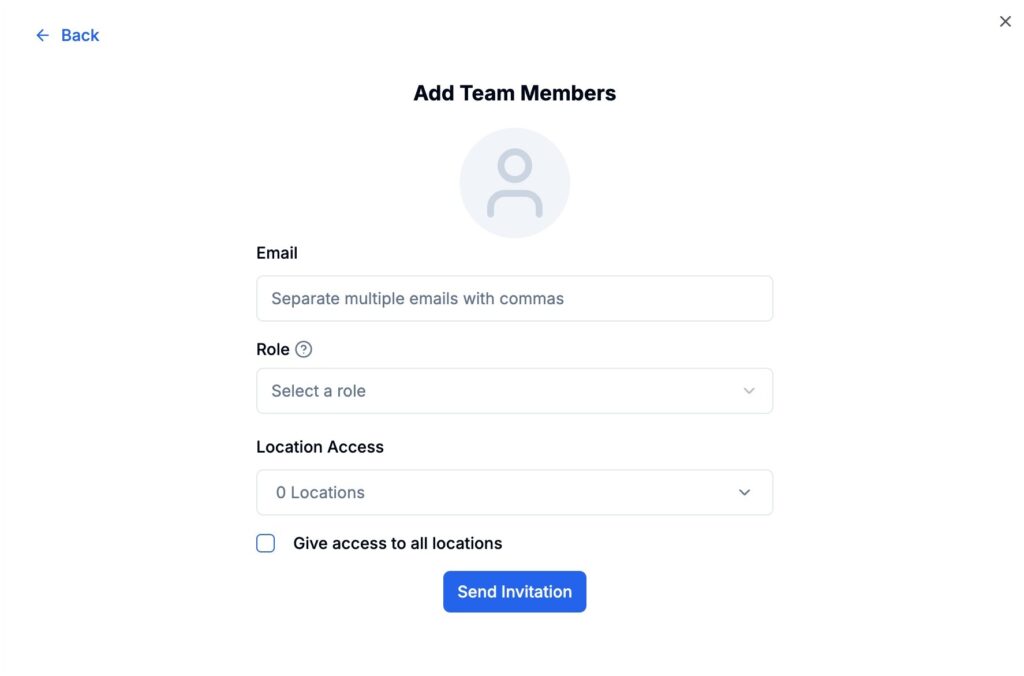
You can add one team member, or several, by adding multiple emails separated by commas in the first box.
Next, select one of the following roles:
Then, select which location(s) you would like the team member(s) to have access to, or check “Give access to all locations,” if applicable.
Finally, click “Send Invitation.”
Like your AI assistant, your team will continuously grow and evolve. Smart Answering gives you the control to easily manage team member access directly within the platform.
This marks the end of our eGuide series for Smart Answering, but your journey has just begun! If you have any additional questions or would like to explore more of our robust suite of AI offerings, click here to contact us today.
We are thrilled that you have chosen Smart Answering to power your business. If you have any questions about your account or would like to explore additional AI offerings within our robust and growing product suite, we encourage you to contact our SoundHound AI experts.
Subscribe today to stay informed and get regular updates from SoundHound Inc.